It has been a long time since I posted anything not that I have any follower to wonder where I went. I've been busy quitting my job to stay home with my kids seem to give me less time to anything because I try to be so involved in their lives. I also started playing video games again which well it what I do I my free time. I'm going to try to post more soon so if you reading this look out for more.
Jess
Tuesday 18 February 2014
Monday 14 January 2013
Valentines Day Banner
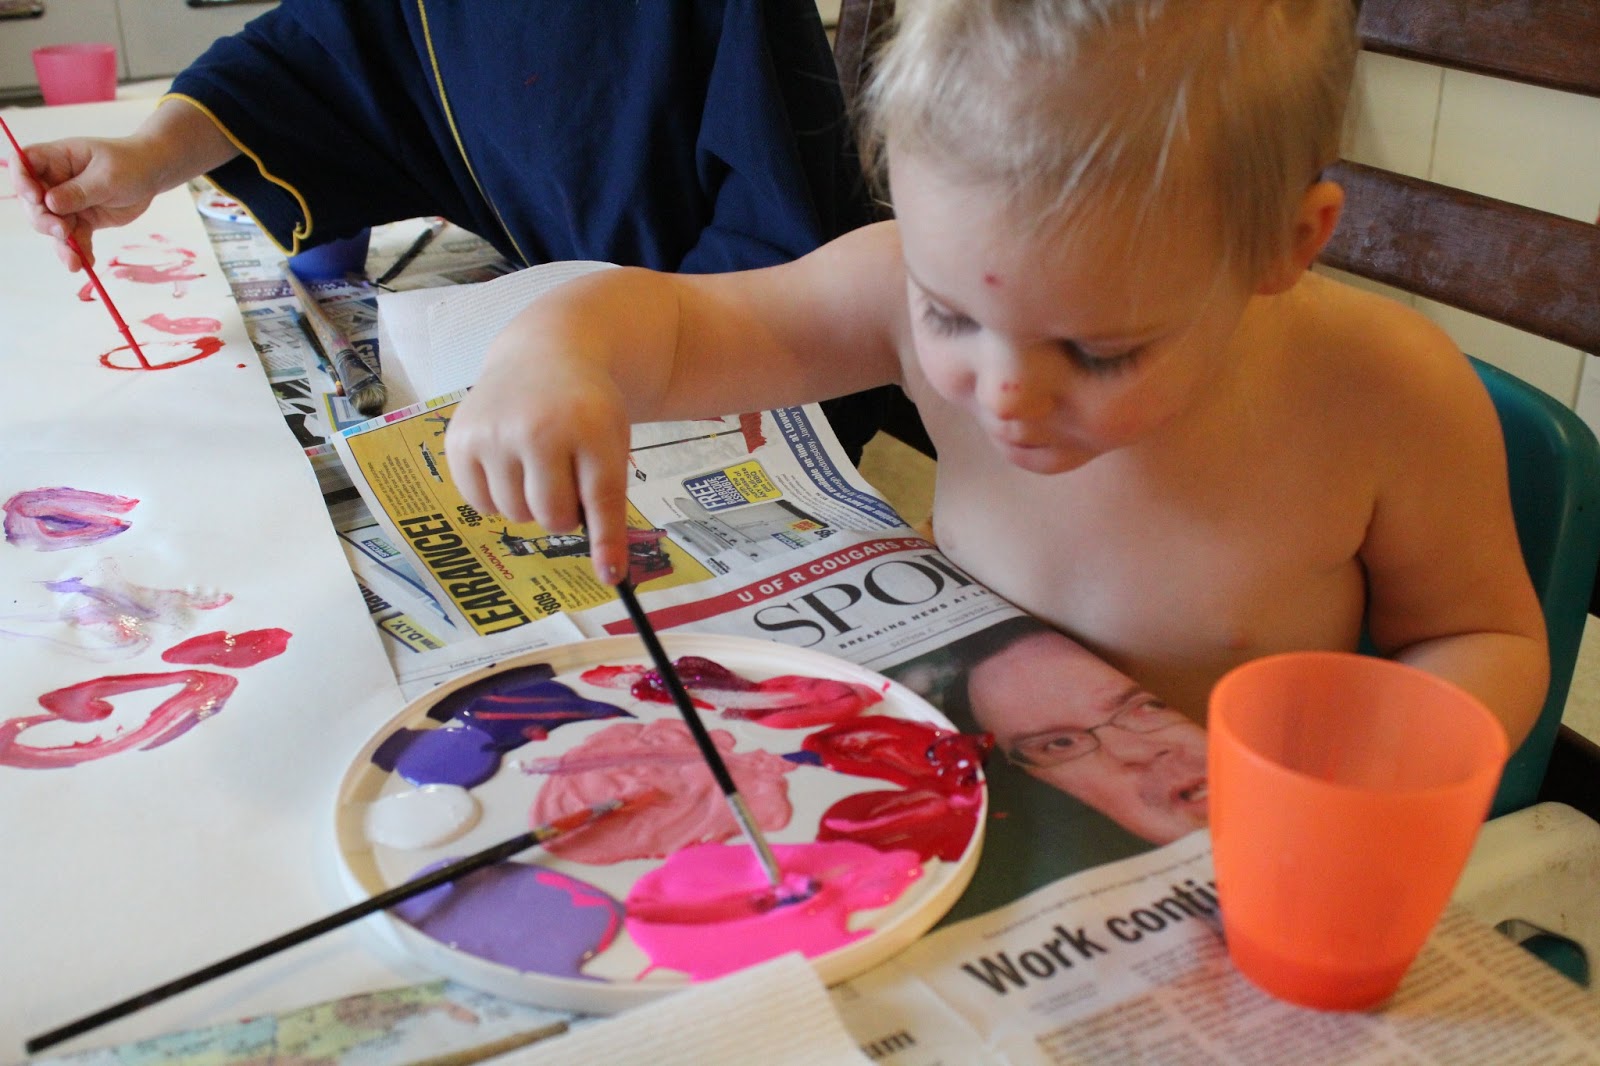
We had a snow day last week and my kids were very bored so I whipped up something for us to do and I think that it turned out very well.
I had a roll of paper that I got last time I was at Ikea. Man I wish we had an Ikea here but I digress. I rolled out the paper the length of my table (after covering it with newspaper), then I got out some paint reds, pinks, purples and some white. I brought my kids to the table and told them I didn't want to see any white paper when they were done.


I had a roll of paper that I got last time I was at Ikea. Man I wish we had an Ikea here but I digress. I rolled out the paper the length of my table (after covering it with newspaper), then I got out some paint reds, pinks, purples and some white. I brought my kids to the table and told them I didn't want to see any white paper when they were done.
This it what it looked like when they were done.
I let it dry for an hour or so and then I went back with some black paint and added some hearts and wrote Happy Valentines Day on it. I didn't think that it popped enough so I filled in the letters with red paint and that turned out great.
Here is the finished project. I think it turned out great for a snowy day craft.
Saturday 12 January 2013
Shaving Cream Painting
I'm not sure where I first saw this but I haven been wanting to do this for a while. I'm kinda a crazy coupon lady and I have stockpiled over 45 cans of shaving cream. It was making me money so I kept buying it now I have lots of it in my basement. So when I saw this idea I awhile ago I kept in the back on my mind.

Here is what you will need to make a lovely shaving cream painting.
Foamy shaving cream (I used Gillette Lemon Lime but I'm not sure I would again as my kids kept trying to eat it because it smelled so good.)
Old paint bush.
Food Coloring
Baking tray.
Spatula.
Cardstock paper.
To start I covered my whole table in newspaper because this was going to get messy. Then I laid out a baking tray.

After that I covered it in shaving cream.

Then I took at spatula and smoothed it all out.

After I had it all smooth I let the kids pick 2 or 3 colors of food coloring to add, any more it would get pretty brown looking.


Here is what you will need to make a lovely shaving cream painting.
Foamy shaving cream (I used Gillette Lemon Lime but I'm not sure I would again as my kids kept trying to eat it because it smelled so good.)
Old paint bush.
Food Coloring
Baking tray.
Spatula.
Cardstock paper.
To start I covered my whole table in newspaper because this was going to get messy. Then I laid out a baking tray.
After that I covered it in shaving cream.
After that grab your paint brush make sure you turn it so you are using the bottom of the brush not the brush end.
Now it time of the fun start to swirl the food coloring in to the shaving cream.
Keep swirling until you getting looking the way you want it to.
Next you take your card stock and place it over the shaving cream and push it down.
Pull the paper off the shaving cream and set it aside.
Grab your spatula again and begin to scrap the shaving cream off.
Let it dry for awhile and you are done now you have some pretty paper to hang up or use the paper to make something new.
Saturday 10 November 2012
Draculaura Boots
I know Halloween has passed so this is a little late but for Halloween my oldest daughter was Draculaura from Monster High. I was going to make the whole costume but I found a good sale so I picked up the costume for $12.


 Here another picture where they are laced up properly she wore them twice once to a school dance and
then once out trick or treating.


Here is what she looks like:
So I got the outfit for $12 and I got a wig at Dollarama for $2.00 it was black with white stripe so I also got a can of pink hair spray to color the white pink. See those pink boots though?
Yeah my daughter needed those to make the costume complete. I saw this link on pinterest and knew this was how I could make her boots.
http://sugarnspicecreations.blogspot.ca/2010/10/costume-party-musketeers-part-6.html
In order to make the boots I got 2 rolls of pink duct tape, 1 roll black electrical tape, a pair of flat shoes, and a pair of knee high socks.
Step 1: Put on the flat shoes and then put the socks on over the shoes.
Step 2: Cover shoes in duct tape the more layers the stronger it will be. I thought I had a picture of this but I guess not.
Step 3: Take a pair of scissors and cut the sock and duct tape off your leg.
Step 4: Wrap more duct tape around and top of the boot and down the sides that you cut open.
Step 5: Take a leather punch or whatever else you think make do the job and punch holes for the laces. The original link says to measure the holes but I didn't I just lined it up the best I could.
Step 6: Add the details to the boots and the tongue for which I just used a strip of duct tape 2 wide and taped it to the top of the inside of the shoe.
Step 7: Put the boots on lace them up and you are done!
Here they are done she loves them.
then once out trick or treating.
After trick or treating the socks were ruined so I had to get rid of the boots but they were well loved and I would totally make boots this way again.
Here is a picture of the whole costume I think it all came together very well.
Linking up at:
Tuesday 18 September 2012
Fish Bowl Pumpkin
Something quick and easy to make is this little fishbowl pumpkin. I got a little fish bowl from the dollar store and some orange water beads. My kids love water beads so I always have some on hand to play with. If you haven't seen them before click here to find out about them.
It turned out great I used a dry erase marker to draw the face on so I can change it when ever I want. So just find yourself a fish bowl and some orange water beads and you are good to go.


Happy Halloween,
Jess
Linking up at:


Thursday 30 August 2012
Star Wars Bingo
My son is turning 4 soon and has requested a Star Wars birthday party I can't tell you how thrilled that make me. I love star wars I even have a star wars tattoo. He had told me he would like to play bingo at his birthday so I went online to see if I could find a star wars bingo game. I was not successful so threw together one of my own and have decided to make is available to others. It was alot of work and it's not prefect but if you would like to use it go ahead just link back to me if you are able to.
 The set contains 20 bingo(VADER) sheet and them a copy of each of the character I used in case you need to make more.
You can download from the link below.
https://docs.google.com/open?id=0B85vvKFi3RpWZEUzWlB3VWM2Wm8

I'm super pumped. Also if you have never read So I Married a Craft Blogger click now and read the whole blog he is super funny and I love his take on crafting.


You can download from the link below.
https://docs.google.com/open?id=0B85vvKFi3RpWZEUzWlB3VWM2Wm8
I was featured:
Linking up at:
Wednesday 13 June 2012
6th Birthday Party
This weekend We had my Oldest daughters 6th birthday party. In the past we have just rented a bouncer and called it a day. This year I was having trouble booking one so I decided to do a Carnival theme instead. So I brainstormed up a list of midway games for the kids to play set to work seeing which ones I could actually make. I decided on a ring toss, knock em down, balloon pop and plinko(not really a midway game but super fun and my husband was on board to build it.) It seemed to go over really well even though it rained the whole party I still had kids out their playing games in the rain. I got the kids to collect tickets like at Chuck E. Cheese and the kids with the most tickets at the end got to pick the first prize.
This is the ring toss booth, I started with a cardboard box and then glued clear beer bottles to the box with a glue gun. Then I made some point values on labels and stuck them on the neck of the bottle. I just bought a few cheap ring toss games and the dollarama and used the rings from that. I spaced the bottles out so it would be a bit easier for the kids to do.

Up next is the Knock Em Down game my husband got me same empty never used smaller paint can and we set them on a chuck of 2 x 4 and let the kids throw balls at them. I should have a taken a picture of the cans after they are so dented and beat up now.


I have a few pictures of the Plinko board in progress that I will post later. My husband did all of the work on this one, but I did the painting of it. I with post more about it later.


Have a Great Day!
Jess

![”Johnny]()
This is the ring toss booth, I started with a cardboard box and then glued clear beer bottles to the box with a glue gun. Then I made some point values on labels and stuck them on the neck of the bottle. I just bought a few cheap ring toss games and the dollarama and used the rings from that. I spaced the bottles out so it would be a bit easier for the kids to do.

Up next is the Knock Em Down game my husband got me same empty never used smaller paint can and we set them on a chuck of 2 x 4 and let the kids throw balls at them. I should have a taken a picture of the cans after they are so dented and beat up now.

Here is the birthday girl posing with the games before her friends get here.
The booths my husband made for me with some left over materials, the signs are made from a piece of coraplast, and then I could not resist making a quick pennants to so under the sign.
The balloon pop board was really easy the hardest part was blowing up 100 balloons. I started by make prize amount and sticking them in the balloon and blowing them up. Then we used a staple-gun and staples them to a piece of plywood. We then gave the kids a tacks(I thought the throwing darts would end with someone losing a eye). When it was their turn we would give them the tack a let them pop a balloon.

I have a few pictures of the Plinko board in progress that I will post later. My husband did all of the work on this one, but I did the painting of it. I with post more about it later.

Last but not least it the cake it made for her. It's not my favourite cake but any means lets just say the that making a tent shape is not easy and I threw out at least one before I got to the finished product. My daughter loved it and that is the most important part.

Jess
Subscribe to:
Posts (Atom)